Netgear Nighthawk AX8 8-Stream Ax5700 Wi-Fi 6 Router
Setup your Netgear Nighthawk 8-stream Ax5700 WiFi 6 router at home using simple steps. To set up the Nighthawk router, first, you have to setup the hardware, second you have to configure the device using Nighthawk login and finally complete the installation. In this guide, you will explore how to set up a Netgear Nighthawk router with ease. So let’s get started without wasting more time:
Detailed Steps to Setup Netgear Nighthawk Ax5700 Router
Here are the detailed steps to set up your Netgear Nighthawk Ax5700 WiFi 6 router, use these steps and setup your router by yourself:
Hardware Setup
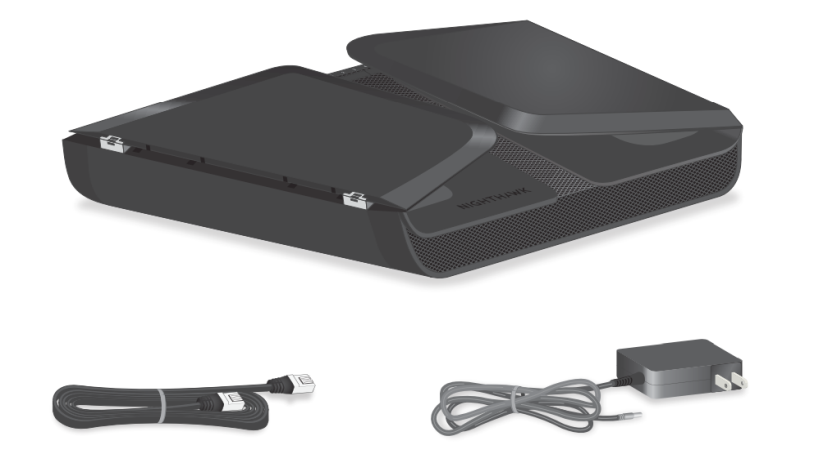
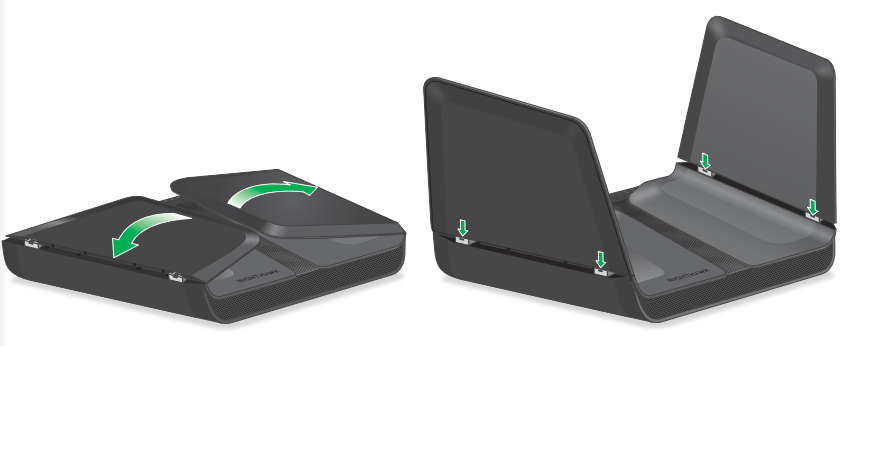
Step 1 : Unpack Router
Unpack the Netgear Nighthawk router package, this package contains the router, Ethernet cable, and power adapter. After unpacking, extend the antennas the same as the image below.
Step 2 : Placement
The place of the router is a very crucial step in providing the router’s signals to every corner of the house. The best place to place the Nighthawk router is near the modem and mid-location of the house. Also, ensure that there is no solid object or device like a microwave near the router, they affect signals.
Step 3 : Connect and Power up
After placement connect your Nighthawk router to the modem using an Ethernet cable. Connect one end of the cable to the LAN port of the modem or another end to the port of the router. Give power to the Nighthawk router using the power adapter that comes with the router. (Always use the power adapter that comes in the package)
Configuration
After completing the hardware setup, you need to configure the router using the web interface. Steps to configure the router are given below:
Step 1 : Connect Device to Router
The first step of configuration is to make a connection between your router and device with an Ethernet cable. You can also use the default network name for wireless connection. This network name is given on the label of the label of the Nighthawk router.
Step 2 : Access Login Page
After connection, go to any updated web browser on a computer or mobile device. Insert routerlogin.net into the address bar and press enter key. It will take you directly to the Nighthawk login page.
Step 3 : Fill Default Login Info
Once Nighthawk login page is loaded, enter the default login credentials into the login field. The default login credentials are given on the label of the Nighthawk router. Generally, a default username is ‘admin’ and a password is ‘password’
Step 4 : Access Web Interface
After filling in the login username and password, click on the login button. You will come to the web interface of the Nighthawk router. Here you can customize the different settings of the Netgear Nighthawk AX8 8-Stream Ax5700 WI-Fi 6 Router.
Conclusion
In conclusion, setting up your Netgear Nighthawk AX8 8-Stream AX5700 Wi-Fi 6 router is an easy process that can be completed in just a few steps. By carefully following the hardware setup instructions, please install & configure your router to provide reliable internet connectivity.
FAQs
How to Update Nighthawk AX5700 Wi-Fi 6 router?
To update the Nighthawk router, the steps are as:
- Access Nighthawk router login account
- On the web interface, go to the advanced settings.
- Click on Upgrading firmware.
- And download the latest one.
Where can I find the default nighthawk router Login credentials?
You can find the default login credentials on the label of the router. This label in pasted on the back/bottom side of the router.
How do I Reset the Nighthawk AX5700 Wi-Fi 6 router?
Reset process the restore the factory default settings of the router, to reset steps are:
- Take a sharp paper clip and put this pin into the reset pinhole.
- This pinhole is present on the router’s backside.
- Press and hold this pin until a light starts blinking.
- Once it turns to solid, the nighthawk router is reset.

Freddie
Author
Freddie is an expert technician and WiFi router specialist who has troubleshooted a number of technical issues related to home and office WiFi networks. His passion to make internet services error free in your house makes him a strong asset for nighthawk-login.com to help internet users through easy set-up guides and troubleshooting tips.