Table of Contents
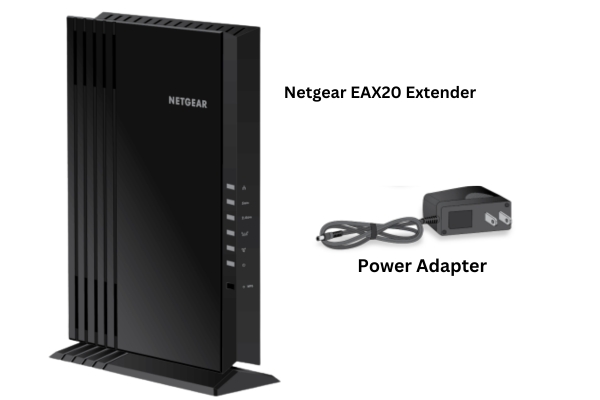
EAX20 Extender Package
In the content package, you will get a mesh extender device and a power cord.
LEDs on EAX20 Extender
There are total six LEDs on the extender, which indicates the extender status.
- Ethernet LED: Shows Ethernet device connected or not.
- 5 GHz LED: Shows extender’s 5GHz WiFi radio is operating or not.
- 2.4 GHz LED: Shows extender’s 2.4 GHz WiFi radio is operating or not.
- Router Link LED: Shows the status of the connection between router and extender.
- WPS LED: Shows the WPS connection status of the extender.
- Power LED: Shows various extender settings status.
- WPS button: Used to connect extender with router wirelessly.

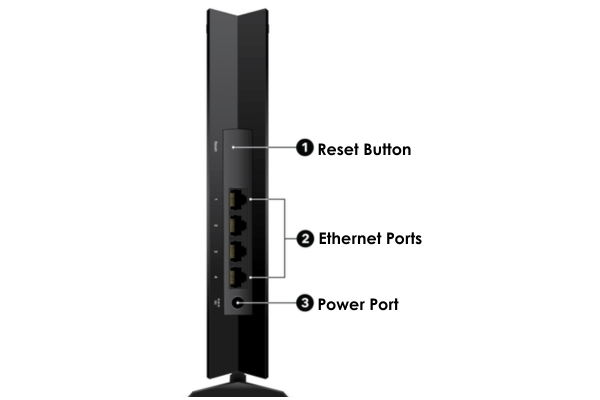
Back Panel of Extender
At the back panel of the extender you will see ports and buttons:
- Reset button: Used to perform factory hard reset on the extender.
- Ethernet Ports: There are 4 Ethernet ports at the back of the extender which connects the LAN devices to it.
- DC Power Connector: Used to connect the power to the extender using the power cord comes with the extender.
How to Setup Netgear EAX20 Extender?
There are three methods that you can use to complete the Netgear EAX20 setup in your home. Let’s learn all of them one by one.
Connect via WPS
- Connect the extender to power near to your WiFi router.
- Press the WPS button on the extender and on the router within 1 minute.
- Wait for a few seconds until the extender’s Router Link LED shows white color.
Your extender’s Power LED will lights white color.
Your extender’s WPS LED will lights white color.
Now, after WPS connection, you can unplug your extender and place it anywhere within router reach depending on the extender model.
The extender’s Router link LED white color means that the router and extender connection is good.
Connect via Nighthawk App
First, you must power on the extender in the same room where the router is and then follow the steps:
- Download the Netgear Nighthawk app in your phone using PLAY STORE or APP STORE.
- Open the app and log in to it with your Email ID and creating a password.
- Now, tap LOGIN button and on next page select the Setup New Device.
- Choose Range Extender and connect with the NETGEAR_EXT from your phone’s Wi-Fi settings.
- Tap on WiFi IS CONNECTED and the app will search the local WiFi networks. Here, choose the router network, which you want to extender.
- You will get to the Create Network page, where enter the extender new username and password.
- SAVE the settings and your extender will take some time to the complete the setup.
Connect the Range extender with the router.
These credentials help you to connect your phone to the extended network.
Your extender’s Router Link LED will show white light when Netgear EAX20 setup is completed and router connects with the router.
After that, you can unplug the extender and plug it anywhere you want in your house within the reach of the router.
Connect via Netgear Genie Assistant
- Plug your Netgear extender to power close to the WiFi router.
- Then, connect your computer to the Netgear_EXT(extender’s network) from its Wi-Fi settings.
- Open the web browser in your connected computer and search the URL address mywifiext.net or IP address 192.168.1.250.
- You will reach the New Extender Setup page. Here, click on the New Extender Setup button to start the installation.
- You will reach to the Create Account page.
- Click on Next, the extender will search the local WiFi network and choose which you want to extend.
- Enter the security to connect the router to the extender and create the extender’s WiFi network by typing the username and password.
Here, enter Your Email ID, password, confirm password and select two security questions to answer.
Now, SAVE the settings and wait for a few seconds so that extender configure sits settings. After that you can connect your internet device to the extended network.
The Netgear EAX20 can also be set up as an access point device by turning on the AP mode from the interface. Let’s learn Netgear Extender Setup in Access Point mode.
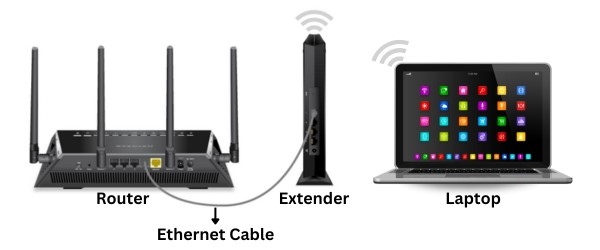
How to Setup Your EAX20 in Access Point Mode?
- Power on your extender and connect with router via Ethernet cable.
- Connect a PC or laptop to the extender’s WiFi network and open the browser.
- Search the mywifiext.net and reach the extender web-based interface, where you must select the Access Point Mode to activate.
- You will be prompted to the extender access point settings page, where you have to enter all information required.
- SAVE the settings and wait for some seconds so that the extender configures its settings.
The extender Power LED will show solid white means it’s fully powered on.
Common Netgear EAX20 Setup Issues
- Can’t connect to WiFi extender
- Can’t join the network and receiving an Error message
- Cannot access mywifiext.net in your device
- Cannot connect extender via Nighthawk app
How to Troubleshoot Netgear EAX20 Setup Common Issues?
Let’s learn how to troubleshooting these common issues.
Can’t Connect to WiFi Extender
- If you can’t access the extender settings in Nighthawk app , you can try accessing the settings through the web-based interface via mywifiext.net.
- If you didn’t know the username and password to access the settings or forgot it, then you must reset the extender and set it again with the help of default credentials.
- It is possible that your web browser is out-dated and showing error while searching the web address. So, update the browser and then access the settings.
Can’t Join Network and Receiving an Error Message
- The first scenario of the issue could be wrong WiFi network name or wrong WiFi password. So, make sure that you have chosen correct network name and entered correct password.
- Check your router is connected to the modem and extender connected to the WiFi router.
- If there is red light on the extender’s Router Link LED, it means the extender and router connection is weak. To fix it, move your extender close to the router.
Cannot Access Mywifiext.net in Your Device
- Browser saying Error when mywifiext.net searched (at the time of Netgear EAX20 setup), means URL is wrong or device not connected to extender’s WiFi network.
- If the URL is not working, then you can use the default IP address 192.168.1.250 to reach the extender settings page.
- Also, try updating the web browser which you are using to reach the interface.To update, go into the browser > SETTINGS > ABOUT > Click on UPDATE.
Cannot Connect Extender via Nighthawk App
- Make sure you have typed correct Nighthawk login credentials to access the Nighthawk app(at the time of Netgear EAX20 setup).
- Check your phone is connected to the extender’s WiFi network.
- Update the Nighthawk app from the PLAY STORE or APP STORE in your phone.