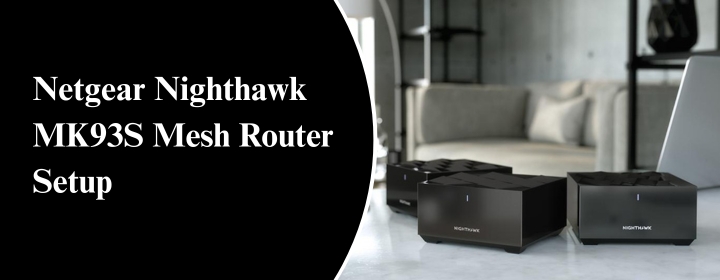
Netgear Nighthawk MK93S Mesh Router Setup
If you’ve recently purchased the Netgear Nighthawk MK93S mesh system and are unsure about how to start, you’re not alone. Setting up a mesh system sounds complicated—but it’s not. You don’t need to be a tech expert to get the Nighthawk Mesh Router up and running. You just need a bit of guidance, and that’ll help you get there.
This guide walks you through the full Nighthawk MK93S mesh WiFi setup, how to handle the Netgear MK93S login via Nighthawk app, and how to fine-tune the Netgear MK93S tri-band router configuration. Whether you’re replacing an old router or setting up a new system in a larger home, this guide will get you connected smoothly.
First Things First: Unboxing and placement.
Inside the box, you should find
- One MK93S main router
- Two satellite nodes
- Power adapters
- One Ethernet cable
Start by figuring out the layout of your space. The main Nighthawk mesh router should go near your modem—preferably in an open area, not stuffed behind a TV or inside a cabinet. The satellites will go halfway between the router and the corners of your home where you want a strong signal.
Step 1: Connect the Main Router
Plug the Ethernet cable from your modem into the yellow port on the back of the MK93S router. Power it on. You’ll notice LED lights start blinking. Let it boot up—this takes about two minutes. You’ll know it’s ready when the power LED turns solid white or blue.
This is the core of your Nighthawk Mesh Router system, so please ensure it is placed in a central location if possible.
Step 2: Position and Power the satellites.
Next, place the two satellite nodes in different parts of your home. A good rule of thumb is to position them where the signal from the main Nighthawk mesh router begins to weaken. Avoid putting them right next to thick walls, fridges, or metal shelving. Once positioned, plug them in and wait a couple of minutes for the LEDs to stabilize.
The system is smart—it will automatically sync the satellites to the main unit wirelessly. There is no requirement for additional cables.
Step 3: Download the Nighthawk App
Head over to the App Store (iPhone) or Google Play Store (Android) and download the Nighthawk app. This app is your control center. It’s clean, user-friendly, and way easier than logging in through a web browser.
Once downloaded, open it and either create an account or sign in. The app is your gateway to managing everything.
Step 4: Begin setting up via the app.
Once inside the app, tap “Set Up a New System.” Choose the model that matches—Nighthawk MK93S.
The app will search for the Nighthawk mesh router and satellites. Make sure your phone is connected to the temporary setup WiFi network that the system broadcasts during installation (usually named something like “NETGEAR_XXXX”).
When it detects everything, it’ll walk you through naming your WiFi network (SSID) and setting a password. Please select a simple yet secure option, steering clear of “admin123” or any easily guessed choices.
This process takes just a few minutes. The app will apply settings and connect your phone to the new network.
And that’s your Nighthawk MK93S mesh WiFi setup—done.
Step 5: Netgear MK93S Login via Nighthawk App
Once the setup finishes, you’ll use the Nighthawk app to manage your system. This is how you log in from now on—no need to remember local IP addresses like 192.168.1.1. The app provides you with access to connected devices, speed tests, parental controls, firmware updates, and more.
If you’re ever prompted for login credentials, the default Nighthawk mesh router login is usually
- Username: admin
- Password: password
However, the app manages all tasks, so you might never need those features.
Step 6: Configure the Tri-Band Settings (Optional but Powerful)
Here’s where the Netgear MK93S tri-band router configuration comes into play. This system uses three WiFi bands:
- A 2.4 GHz band for older or low-bandwidth devices
- A high-speed 5GHz band for modern devices
- A dedicated 5GHz backhaul band that connects the satellites to the main router
You don’t have to touch anything here if you don’t want to. The system’s default Smart Connect feature automatically assigns devices to the best band for performance. But if you’re a bit more hands-on, you can:
- Separate the SSIDs for each band.
- Manually assign high-demand devices (like gaming consoles) to 5 GHz.
- Prioritize devices in the app for better performance.
Head into WiFi Settings > Advanced inside the app to explore these options.
Step 7: Final Checks and Optimization
Once everything’s set up:
- Run a speed test in the Nighthawk app to make sure your system is getting the expected speeds.
- Walk around your home with your phone and test WiFi in various rooms.
- If a satellite isn’t giving a strong signal, move it a few feet and test again.
The app also allows you to schedule firmware updates, which I advise doing at off-peak times (like 2 AM) to avoid interruptions to your connection.
Troubleshooting Tips
If anything feels off, here are a few real-world fixes:
- Can’t find the router in the app? Please ensure your phone is connected to the temporary setup network.
- Satellite not syncing? Please restart the device and position it closer to the Nighthawk mesh router for the initial synchronization.
- Slow speeds? Try repositioning the satellite or turning off bandwidth-heavy apps while testing.
The Nighthawk app also has a built-in help section that’s actually useful—not just a bunch of jargon.
Wrapping Up
This completes your Netgear Nighthawk MK93S mesh WiFi setup, eliminating any uncertainty. Once it’s live, you’ll notice the difference right away. There will be no more dead zones. No more dropped Zoom calls. There is now solid, fast WiFi available everywhere.
Between the smooth Netgear MK93S login via the Nighthawk app, the powerful tri-band setup, and the plug-and-play design, this is one of the easiest systems I’ve worked with. It operates flawlessly.
Set it. Forget it. Enjoy it.
FAQs
Do I need Ethernet cables for the satellites?
Nope. The satellites connect wirelessly to the router.
Can I use this system with my current modem?
Yes. As long as your modem supports internet, the Nighthawk system will connect right to it.
What if I want to log in through a browser instead of the app?
You can. Go to 192.168.1.1 in your browser and use your admin credentials.
Can I expand the system later with more satellites?
Yes. You can add compatible Nighthawk mesh satellites anytime.
Does this support parental control?
It does. The Nighthawk app includes robust parental control settings.
Will this work in a 2-story house?
Absolutely. All three units can accommodate an area of up to 7,500 sq. ft.

Freddie
Author
Freddie is an expert technician and WiFi router specialist who has troubleshooted a number of technical issues related to home and office WiFi networks. His passion to make internet services error free in your house makes him a strong asset for nighthawk-login.com to help internet users through easy set-up guides and troubleshooting tips.