Understand Nighthawk Extender Body
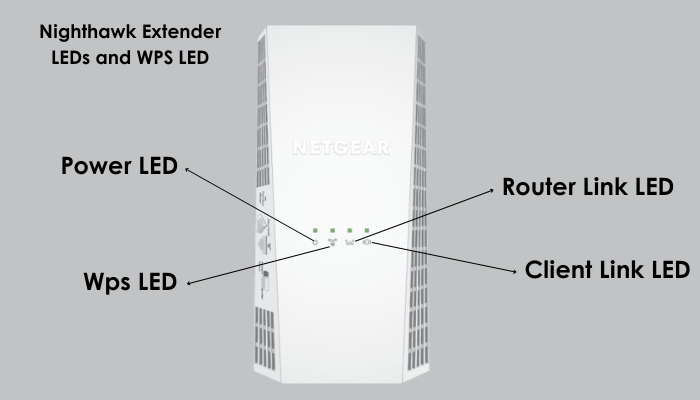
LED Lights:
There are four LED lights on the extender that display green, amber, and red colors.
- Power LED
- WPS LED
- Router Link LED
- Client Link LED
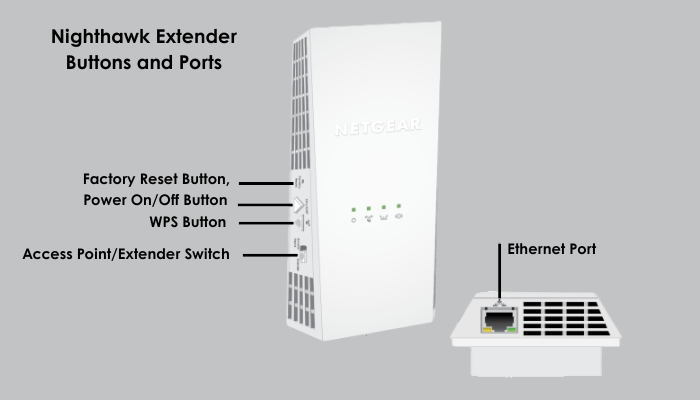
Ports & Buttons:
There are buttons and ports on the side and bottom of the extender.
- Factory RESET Button
- WPS Button
- Access Point/Extender Switch
- Power On/Off Button
- Ethernet Port (1)
How to Setup Nighthawk Extender in Extender Mode?
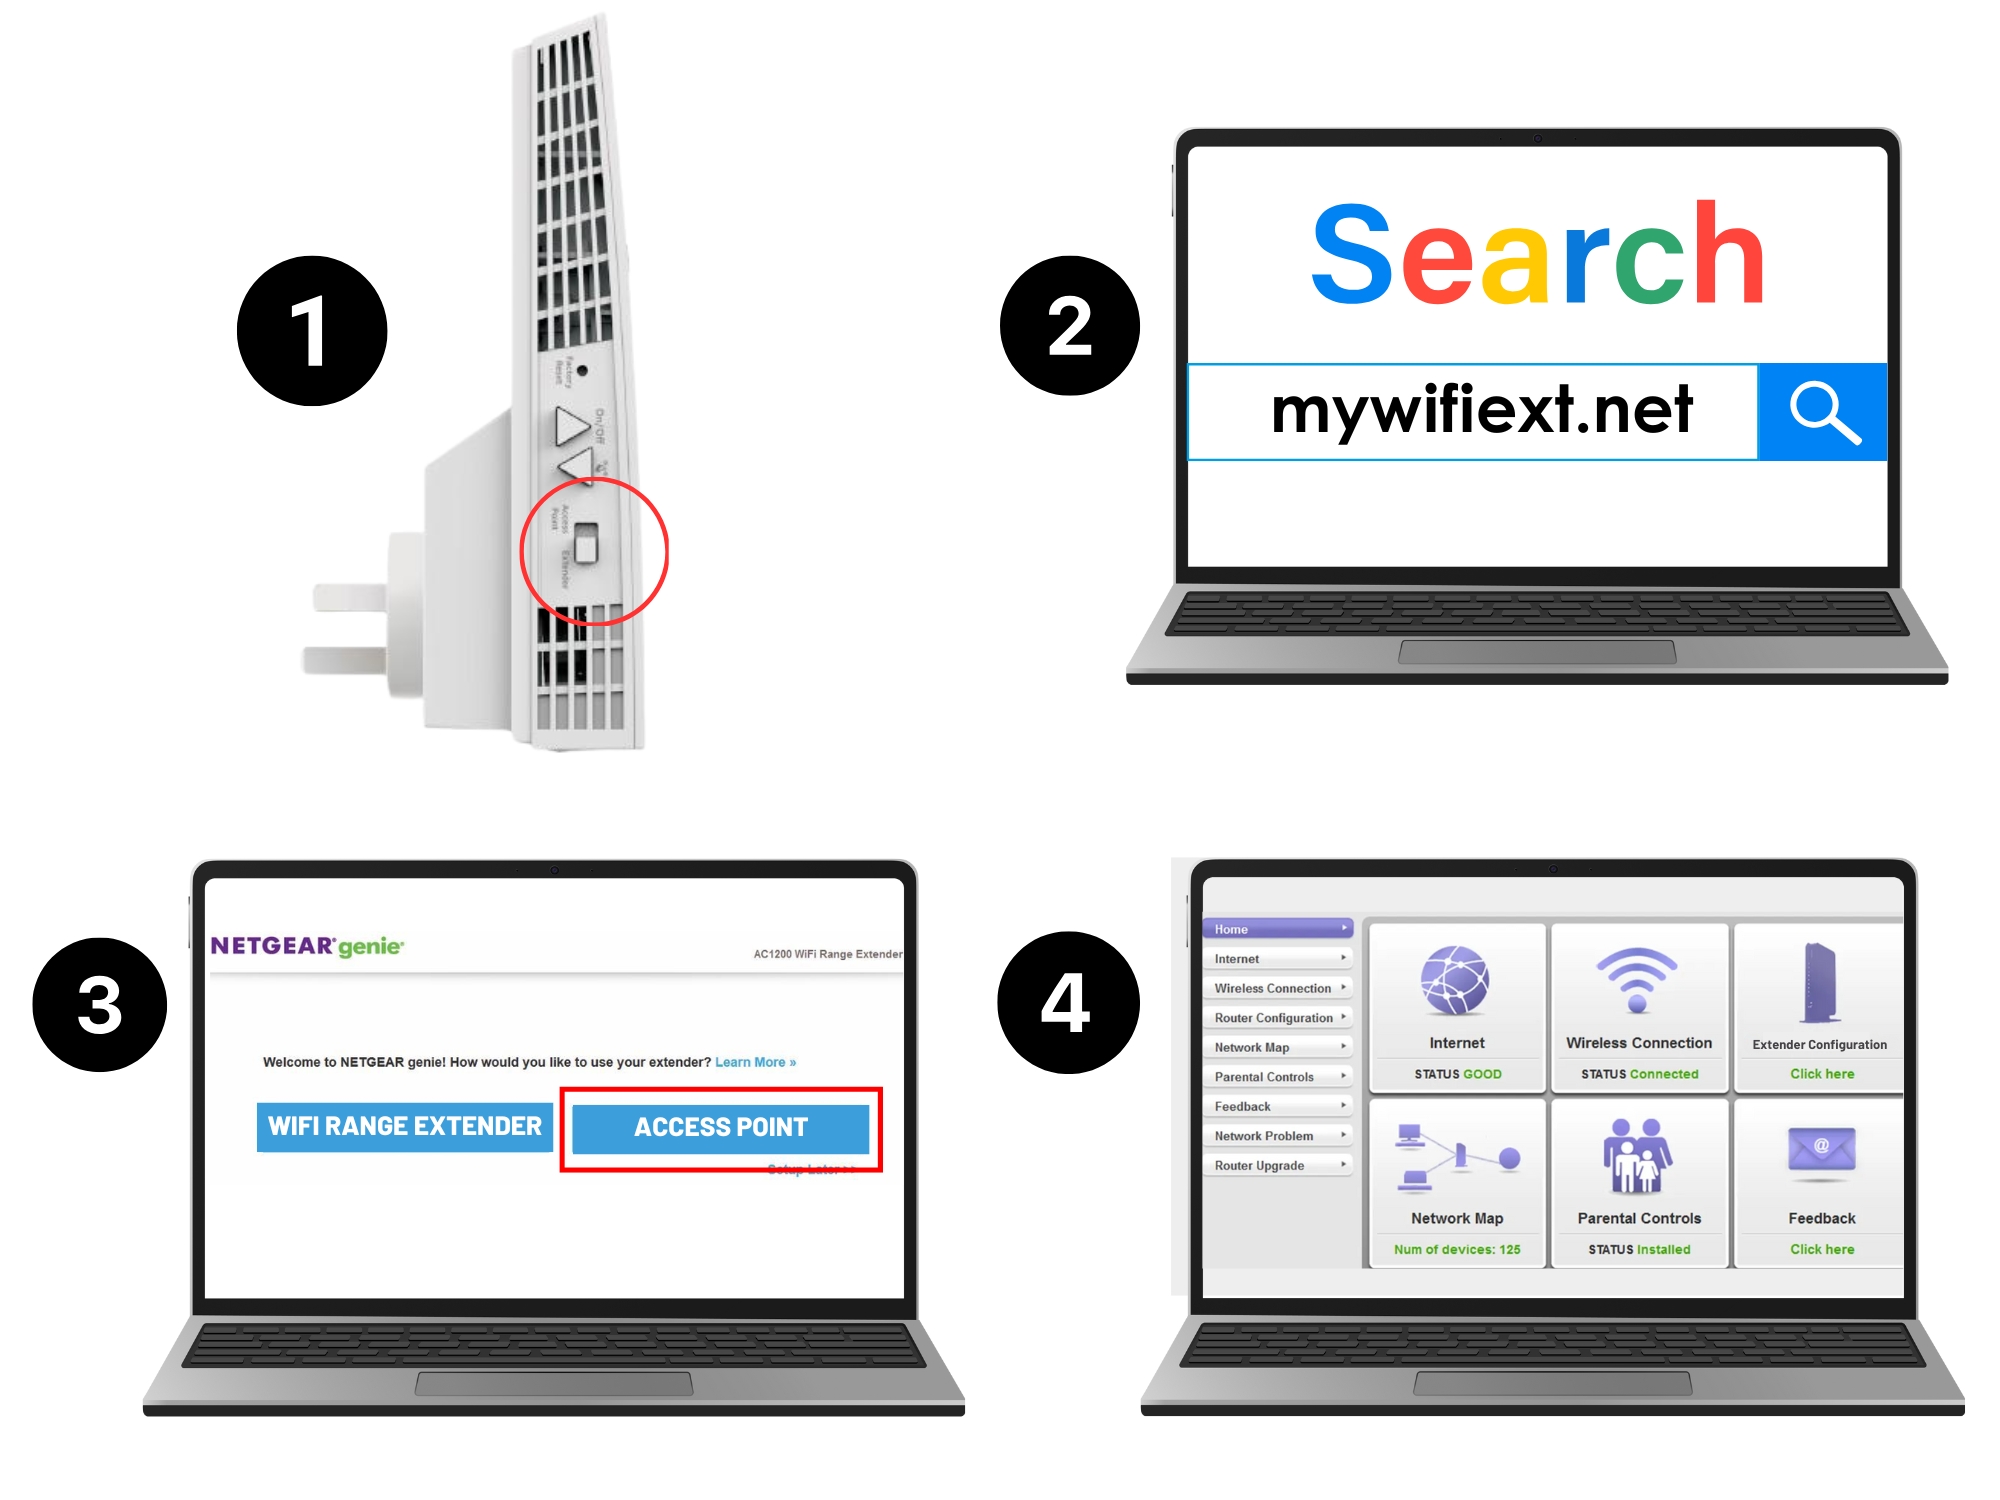
Connect extender to the power outlet and switch it into the Extender mode using the Access point/extender switch button on the device. Use one of the below methods to connect the extender to the router.
- WPS
- Netgear Genie Assistant
- Nighthawk App
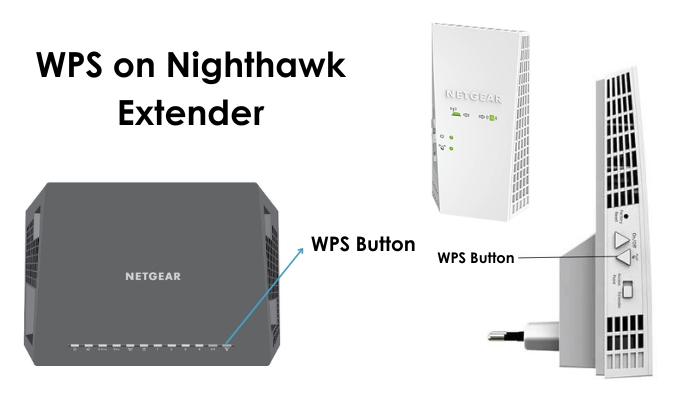
Connect Through the WPS (Wi-Fi Protected Setup)
- Place range extender near home router and plug it into the power outlet.
- There is a WPS button both on the extender and the router.
- Press WPS button on the extender first, and its WPS LED will start blinking green color.
- Then within 1 minute press the same WPS button on the router.
Note: If your router has no WPS button on the hardware, then you should access the router interface and activate the WPS from there.
- When extender connects with the router, the WPS light on the extender will stop blinking and it will go solid green.
- Once installed, you can place and plug-in the extender anywhere, but within the reach of the router (about 20ft-40ft).
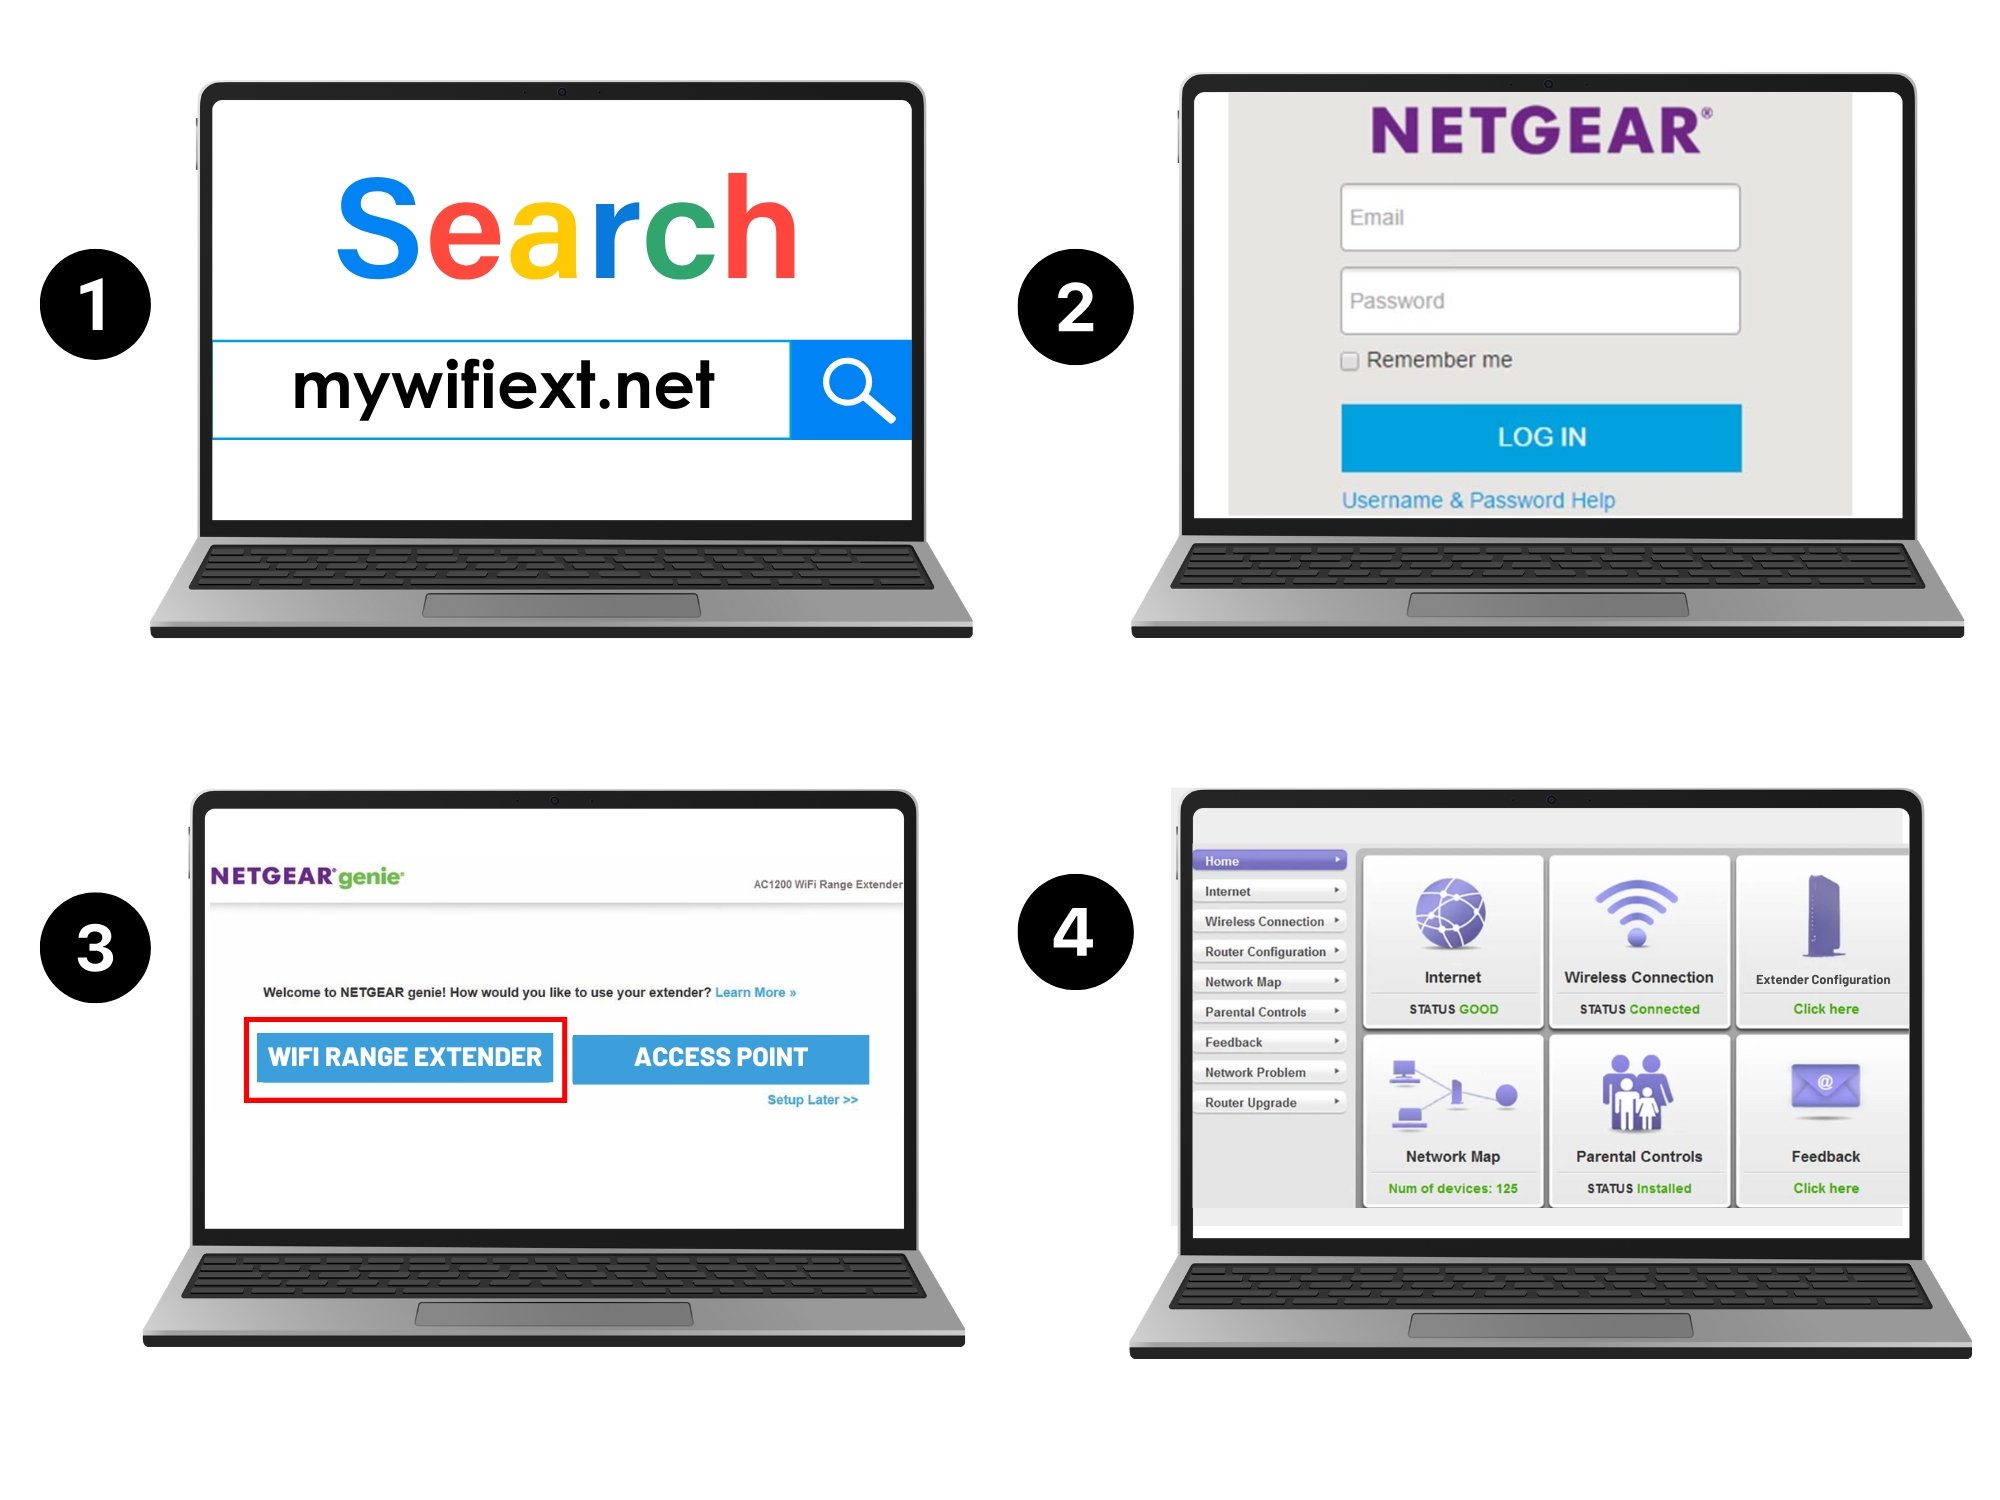
Connect Through NETGEAR GENIE Assistant
- Connect computer to the extender with the help of Ethernet cable and open the web browser.
- Next, Search URL address mywifiext.net or IP address 192.168.1.250 to reach Netgear Setup New Extender page.
- Click on the NEW Extender Setup button to reach Create Account page.
- Enter all details here, namely: email ID, password, confirm password, answer security questions, and click on the SIGN UP button.
- You will reach a new page showing two options: Extender mode Setup and Access point mode. Select Extender mode.
- Now connect with your existing WiFi network for which you want to extend the range. After that, enter username and password to create the extended network.
Note: Some extenders provide dual band technology (2.4GHz and 5GHz). In that case, you can create two extended networks. One is 2.4 GHz network and other is 5 GHz network.
Connect Through Nighthawk App
- Download Nighthawk app in your smart phone from the Play Store or App Store.
- Open the app and tap the New Device Setup button. Next, choose the Range extender option.
- Follow all steps to setup your extender like connecting phone to the extender’s network (which usually shows up as NETGEAR_EXT).
- Now, the app will take you to another page called CREATE NETWORK. Here, enter new extended network username and password.
- Tap Continue to access and manage all settings from the app’s dashboard.
Note: If your router has no WPS button on the hardware, then you should access the router interface and activate the WPS from there.

How to Setup Netgear Extender in Access Point Mode?
- Set the Access point mode ON using the Access Point/Extender Switch button.
- Next, connect extender to the router with the Ethernet cable. Confirm that you plug the ethernet cable into the router’s LAN port only.
- Go to Netgear Genie assistant in your web browser of computer/ laptop using IP 192.168.1.250.
- Select ACCESS POINT mode option on Netgear Genie interface.Now, the extender’s separate network is created. Just enter the username and password, and SAVE the settings.
Like this ,connect with the extender wirelessly and enjoy the extended network.