192.168.1.1: Router Settings Access Guide
Apart from using a router’s web domain, you can also access its admin panel through the default IP address. However, many users are not familiar with how to log in using this IP. To make it easier, here’s a simple step-by-step guide to access 192.168.1.1 and reach your router’s settings page.
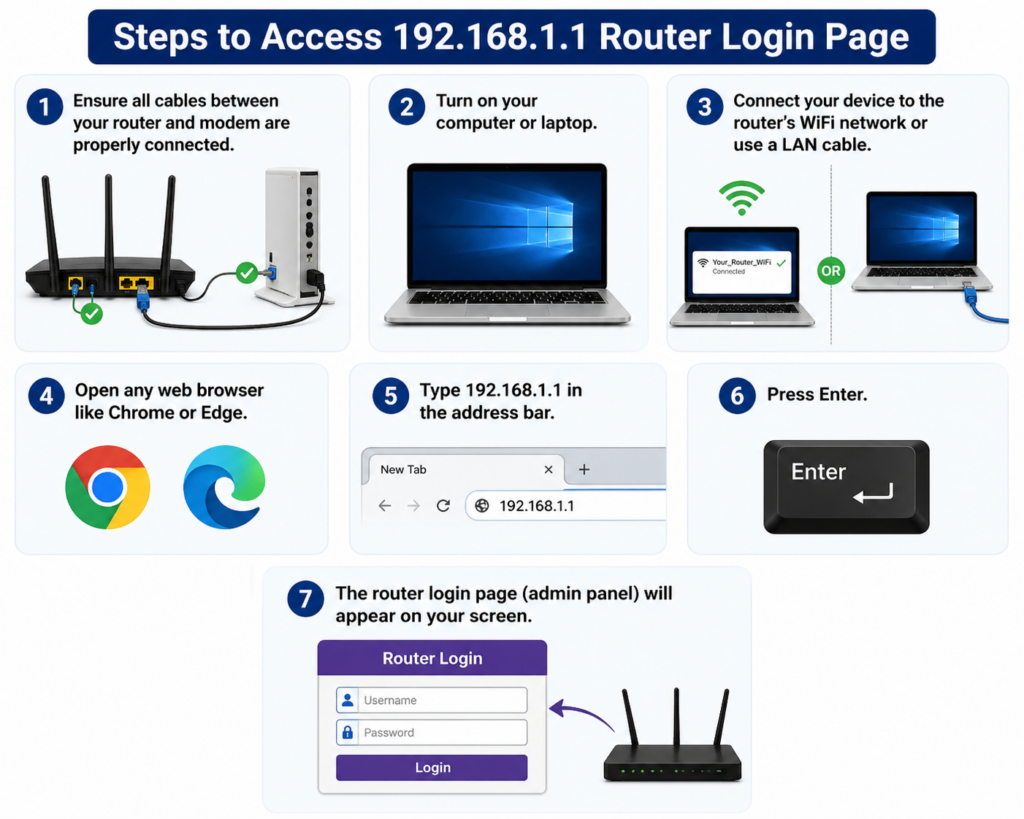
Steps to Access 192.168.1.1 Router Login Page
Follow these instructions to log in to your router using the default IP address
- Ensure all cables between your router and modem are properly connected.
- Turn on your computer or laptop.
- Connect your device to the router’s WiFi network or use a LAN cable.
- Type 192.168.1.1 in the address bar.
- Press Enter.
- The router login page (admin panel) will appear on your screen.
To proceed further, enter the router’s login credentials. For most Netgear routers, the default username is admin, and the password is password or 1234 (for older models). Always enter these details in lowercase.
192.168.1.1 Not Working? Try These Fixes
If you are unable to access the IP address, the following solutions may help:
1. Enter the Correct IP Address
Make sure you type the IP correctly. Avoid mistakes like 192.168.1.1 or 192.168.11. Even a small typo can prevent access.
2. Check Your Internet Connection
Inspect all cables connected to your router and modem. Ensure they are secure and not damaged. Also, confirm that your device is connected to the router’s network.
3. Update Your Browser
Use the latest version of your web browser. You can also clear cache and cookies to fix loading issues.
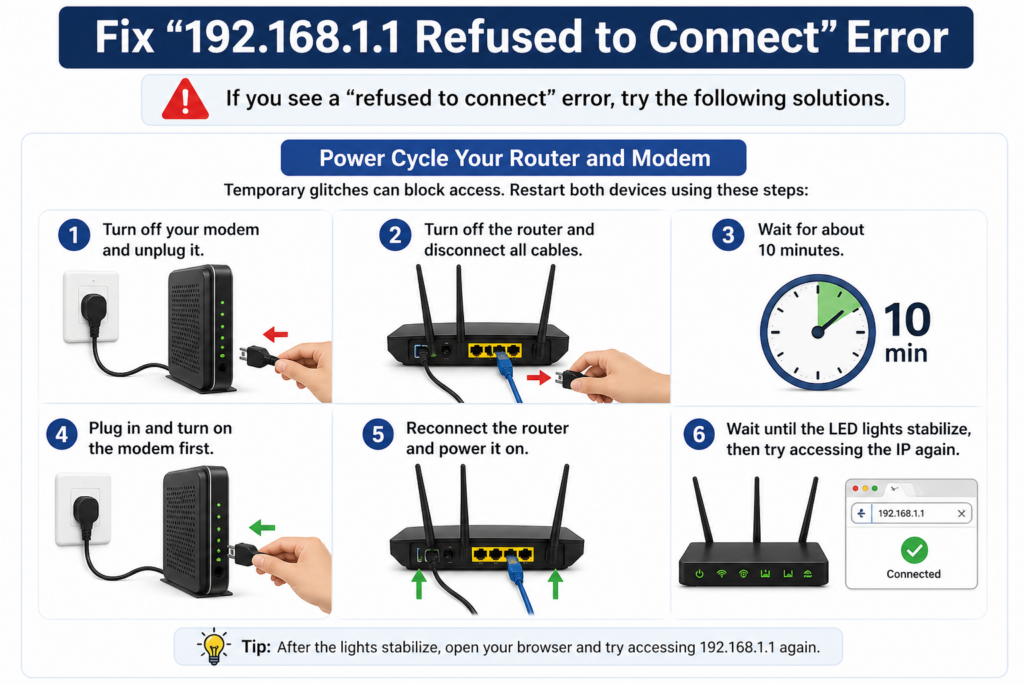
Fix “192.168.1.1 Refused to Connect” Error
If you see a “refused to connect” error, try the following solutions:
Power Cycle Your Router and Modem
Temporary glitches can block access. Restart both devices using these steps:
- Turn off your modem and unplug it.
- Turn off the router and disconnect all cables.
- Wait for about 10 minutes.
- Plug in and turn on the modem first.
- Reconnect the router and power it on.
- Wait until the LED lights stabilize, then try accessing the IP again.
Connect to the Correct Network
Make sure your device is connected to your router’s network:
- Open Network & Internet Settings on your computer.
- View the list of available networks.
- Select your router’s WiFi network.
- Enter the WiFi password and click Connect.
Still Not Working?
If the issue persists, you can reset your router:
- Press and hold the RESET button for about 30 seconds.
- Wait for the router to reboot and the LED lights to stabilize.
- Restart the router once again.
- Try accessing 192.168.1.1 to set up your router.